An Introduction to Views
A View is a way of filtering Items on a Table. A view can be created, edited, or deleted when viewing a Table, Gantt Chart, or Board. A View is the essential method for sorting or ordering items, and well as determining which items should visible or hidden.
Views also affect which items are visible when selecting data using a Lookup Field, Multi-Lookup Field or User Field. You can read about how views are rendered within Lookup Fields, Multi-lookup Fields, and User Fields here.
In Rapid, the default view is called the All view. You can also create, edit, or delete views. Switching between views is useful, because they allow us to find the data quickly.
For example, if you are a project manager for a company, you do not want to view all projects that the company has ever undertaken. Instead, you will want to view all the current projects that you are managing. If we needed to see projects that have concluded, we could build a view for this as well. Therefore, by using views, we can essentially "zoom in" on the items we need, and hide the items that we don't need.
Views in Tables
When using a View with Data Table, you can control:
- If an item appears in a the Table's list, or not
- The order that items are displayed in
- Which columns are displayed
Note that any new columns added to a table will be automatically added to the All View. System Columns, however, will need to be added manually to a View if they are required.
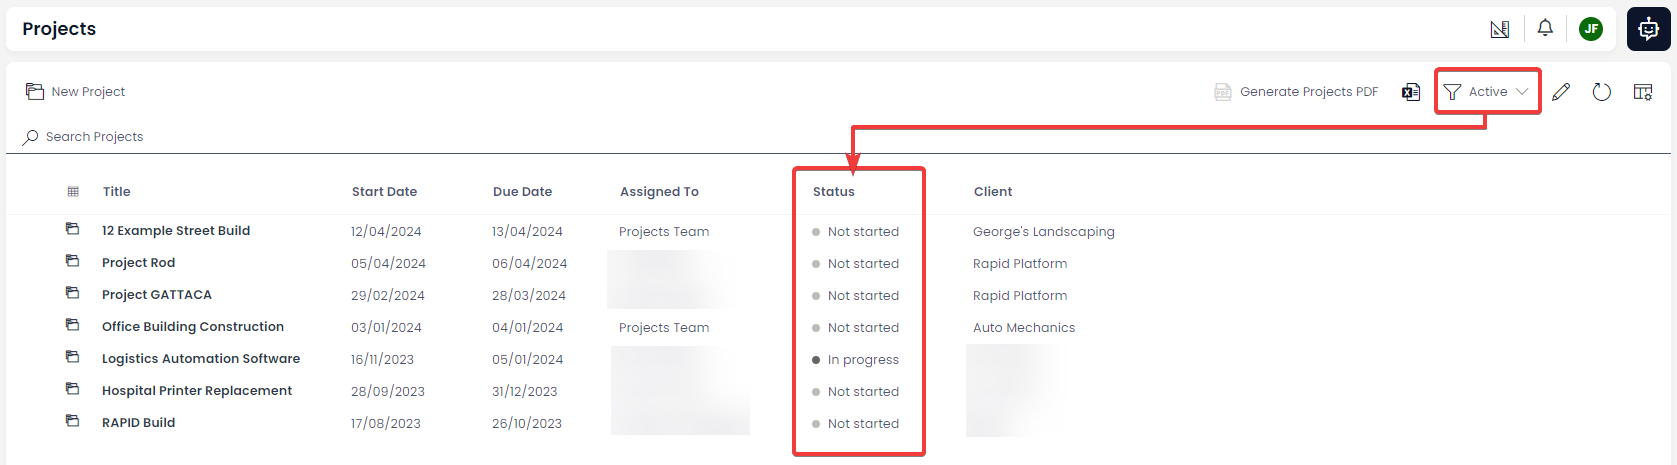
In the example above, we can see the View titled "Active" is being used. The table will now only show projects that are not Completed or Aborted. This is achieved by filtering the choices that appear in the Status column.

In the same table, if the view is set to "Inactive", the table will now only display projects that are Completed or Aborted. This is achieved by filtering the choices that appear in the Status column.
Views in Gantt Charts
At the time of writing, Views do not function as anticipated in the Gantt Component. For example, you can switch to a new Gantt Chart view that reveals more tasks. However, you cannot switch to a view that hides or reveals less tasks than the default All view.
Views in Boards
When using a View with Board, you can control:
- If an item appears on the Board component, or not
- The order that items are sorted, and are displayed in the board's containers
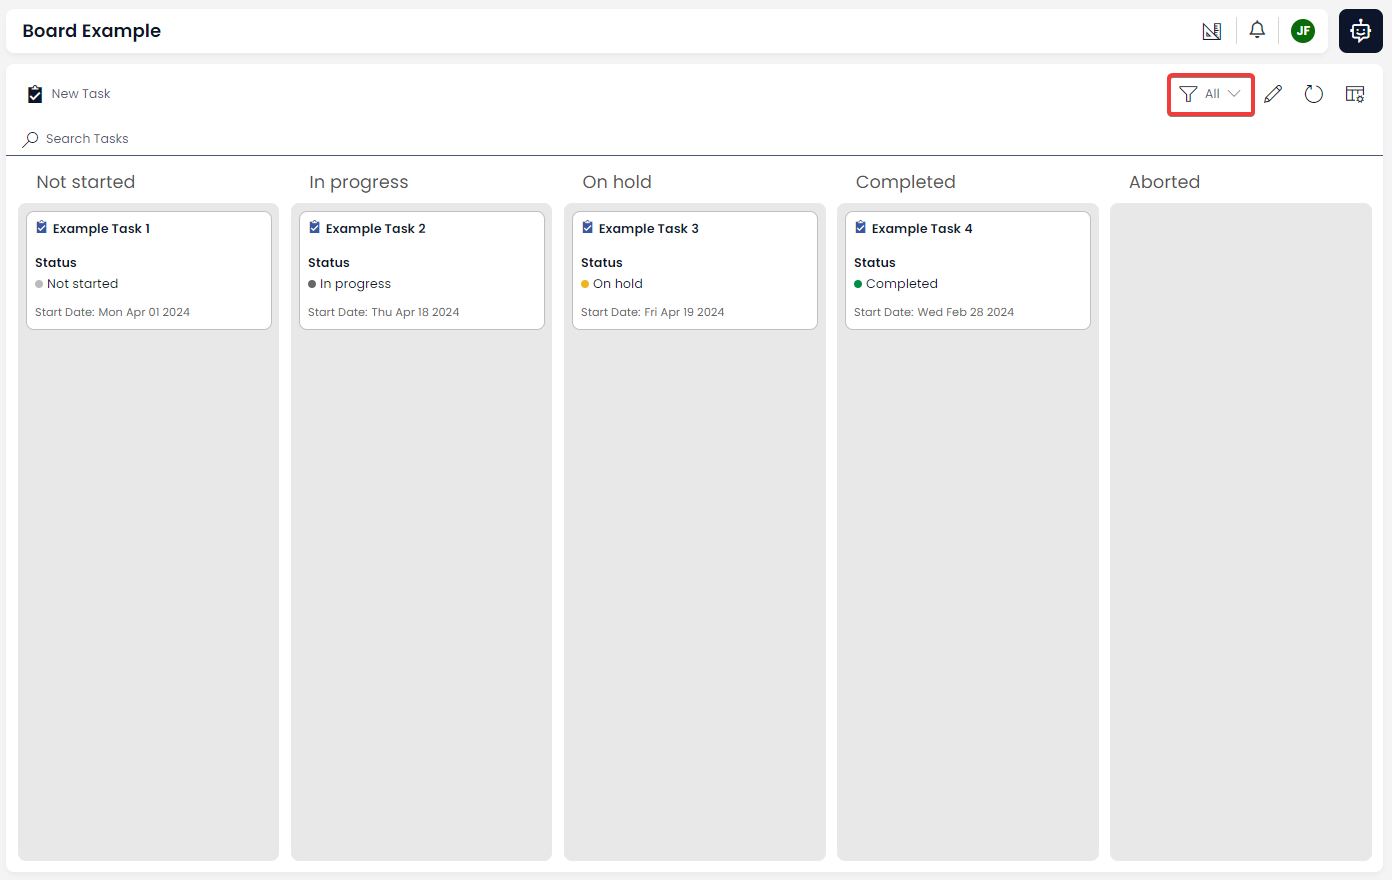
In the example above, the "All" view has been selected. As a result, all of the tasks are visible in the board component.
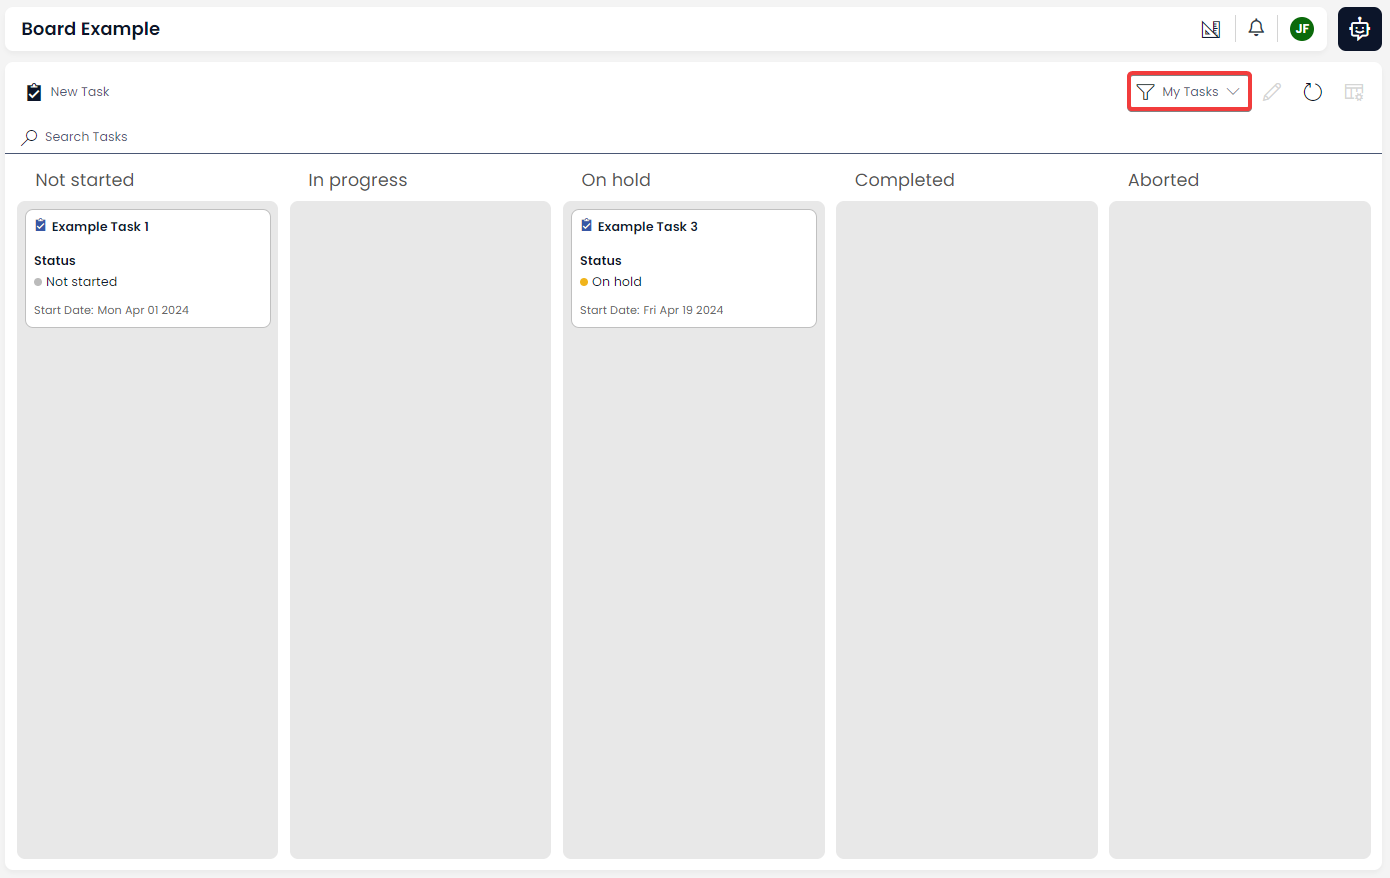
On the same board, changing the view to "My Tasks" (which is a default view that is packaged with Rapid), the items are filtered to only show Tasks that are assigned to the current user.
View Controls
There are three View Control buttons in the Command Bar of a Table, Gantt Chart, or Board.

Below is an explanation of each of these buttons and their purpose:
| Label | Button Name | Description |
|---|---|---|
| 1 | Views Dropdown | This button opens a dropdown menu where you can switch between views. Additionally, there is an option to Create Views here as well. |
| 2 | Edit View Mode | This allows you to change the way a view is displayed on a table. You can also change which column the view will sort its items by. |
| 3 | Edit View Panel Button | This button opens a side panel, where you can change the rules governing what a view will and will not display, as well as how the view will sort its items. |
Each of these buttons and their functionality will be discussed further in the next sections.